
Office Management
Last updated on 22/11/2019
This module is meant to facilitate the management of Office related information. Due to the importance of the information, whenever a change occurs this needs to be registered in COIN without delay.
Please make sure that the data entered is correct and it is periodically updated since it is used for the preparation of FAO Telephone Directories and by all FAO Intranet users for contacting Decentralized Offices.

Important note: Information inserted in this module will impact on other modules, please click HERE for a diagram showing the relationship between the relevant modules.
How to get there
Log-on using your Username and Password, click on "Countries & Offices" on the top navigation bar, then select "Office Management".
Select the Office from the "Office" drop down menu, all the information displayed below it only refers to the selected office:
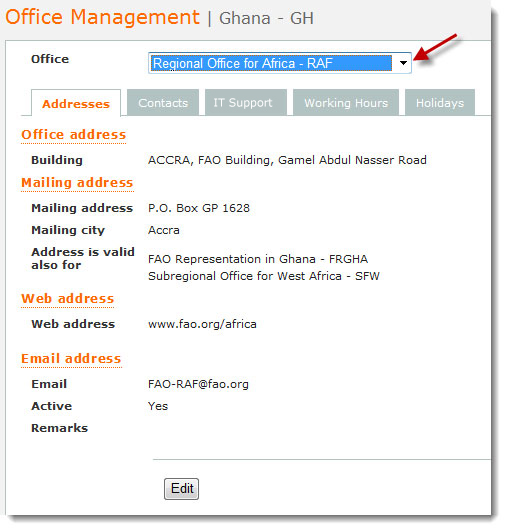
The Office information is grouped under five differents sections/tabs:
The Office "Addresses" tab include the office physical and mailing addresses but also the web and e-mail addresses. To Edit an address, select the Office from the drop down menu, click on the "Addresses" tab and click on the "Edit" button:
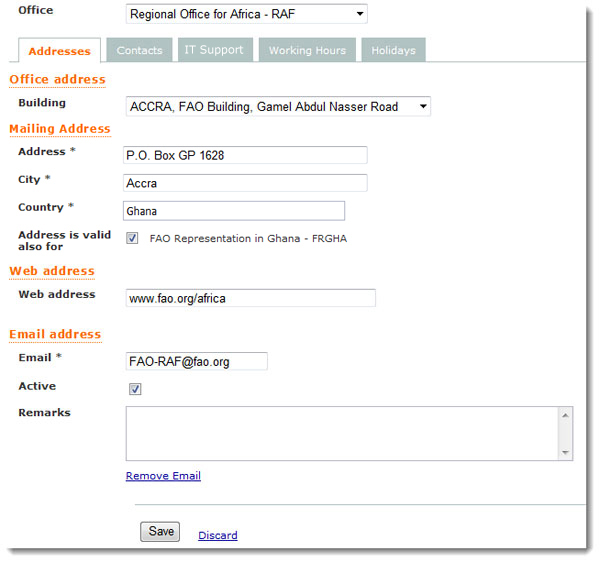
Office Address:
- Building: If there is more than one building for the FAOR, RO or SRO, please select the main building from the drop down menu. The address of the selected building will be used as the main address for the office. To make changes to the address of the building or to add a new building use the Facilities Management module.
- Address*: Insert the mailing address (E.g. P.O.Box)
- City*: Insert the name of the city.
- Country*: Start typing the name of the country and then select it from the list.
- Address is valid also for: This option is only available to offices hosted in Sub-regional or Regional offices. Tick the appropriate box and the address will be automatically displayed in the selected offices.
- E-mail*: Insert or edit the e-mail address
- Active: Tick the box if the e-mail address is currently in use.
- Remarks: Insert any relevant information
- Remove E-mail: To remove an e-mail address all together click the "Remove E-mail" link. Once the e-mail address has been removed to add a new one click the "Add E-mail" link.
Click on the "Save" button to save changes, or the "Discard" link to close the window without saving.

Please note:
- Insert the "Mailing Address" even if it is the same as the "Office Address".
- Each office is allowed to have only one official "E-mail address".
- All fields marked with an asterisk (*) are mandatory.
This section allows the insertion of the office contact numbers, in a internationally-standardized format (inclusive of country & city codes).
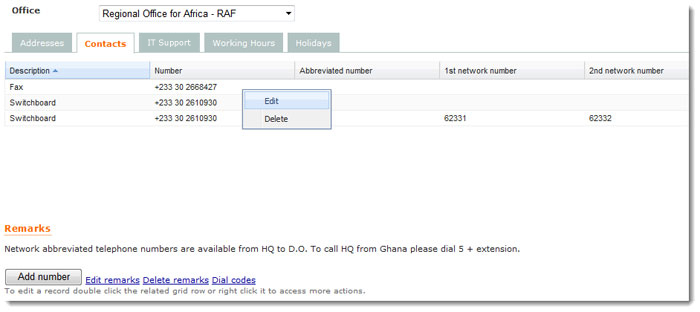
To Add a new office contact number, select the Office from the drop down menu and click on the "Contacts" tab:
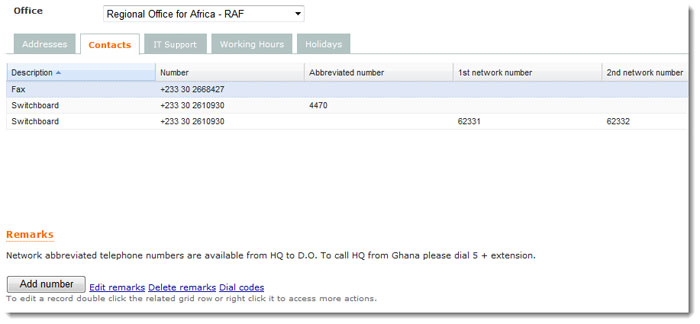
To add a new telephone number click on the "Add Number" button:
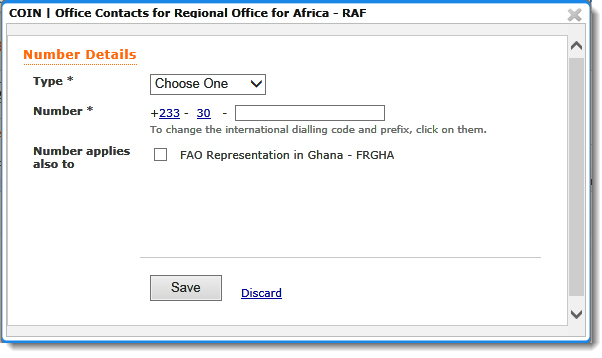
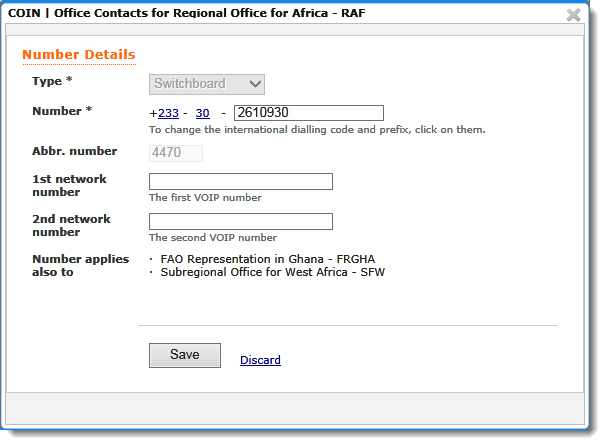
Telephone number details:
- Type*: Select the Type of contact number from the drop down menu. Available options are: Emergencies, Library, Switchboard, Tel. Conference, Satellite and Fax.
Please note that it is not possible to add more than two Switchboard numbers. - Number*:
- Country code: it defaults to the international country code automatically saved in the system, it can be changed by clicking on it.
- City code: it defaults to the City code which has been set up in the "Dial Codes" section described below. It can be changed by clicking on it.
- Number: Enter the new number
- Number applies also to: This option is only available to offices hosted in Sub-regional or Regional offices. Tick the appropriate box and the number will be automatically displayed in the selected offices.
- 1st and 2nd Network numbers: they refer to VOIP (voice over internet protocol) numbers and they are only available for office switchboards entries.

Please note that "Country" and "City" dialing codes must be inserted once only in the text fields provided. Only numeric values or blank spaces can be used. Any other signs (+, -, etc) generate a warning message which do not allow to save the data.

Please note that all fields marked with an asterisk (*) are mandatory.
Edit Office Contacts
To update the Office contacts, double click on the number you want to change or just right click on it and select "Edit":
Update the telephone numbers as required. The country and city codes can be changed by clicking on them.

Please note that the field "Number applies to" is no longer editable. In order to edit this field the number has to be deleted and added again.

Abbreviated numbers are automatically generated by the system and will be notified by e-mail.
Delete office contacts
Right click on the number you want to delete, and select "Delete". A message appears that prompts to confirm the deletion. To proceed, click "Yes". To abort the action, click "No".
Add/Edit Remarks
You can also Add or Edit additional information by clicking the "Add Remarks" or "Edit Remarks" link at the bottom of the main Contacts tab.
This is quite useful if you need to display any important information regarding your lines.
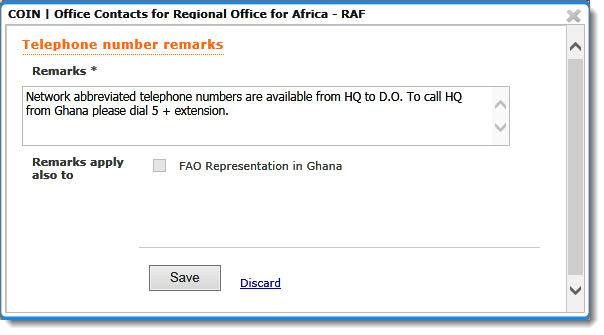
Enter the information in the "Remarks*" text area and if applicable tick the "Remarks applies also to" box.
Click on the "Save" button to save the changes or the "Discard" link to close the window without saving.
Once a Remark has been saved, it can be futher Edited or Deleted by clicking the "Edit Remarks" or the "Delete Remarks" links accordingly.
Dial Codes
The Dial codes section relates to the City Code (not to be confused with the country code which is set automatically by the system).
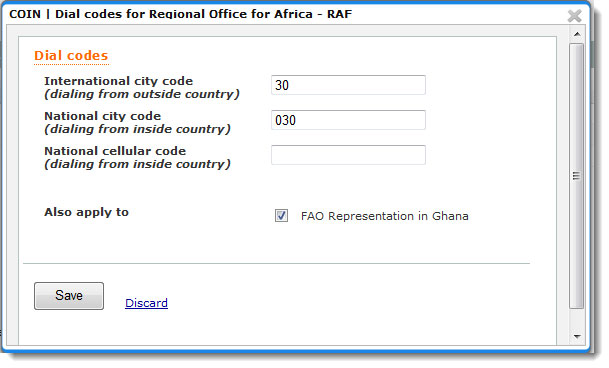
(dialing from outside country): Insert the City code as you would dial it from outside the country (normallywithout the "0" zero in front)
(dialing from inside country): Some countries require a "0" (zero) in front of a city code when a number is dialed from within the same country. Insert the full code which includes the "0" (zero) in this field only if applicable, otherwise leave the field blank.
(dialing from inside country): Some countries require a "prefix" (zero) in front of a cellular number when is dialed from within the same country. Insert the prefix in this field only if applicable, otherwise leave the field blank.

If the number does not change when dialed from outside or inside the country, insert the code only in the "Intl. city code" text field.
Click on the "Save" button to save the changes or the "Discard" link to close the window without saving.)
IT Support
This section allows the insertion of the IT support provider for the office. It can be a FAO Office Technology Coordinator (or ICTO for Regional Offices) or an external IT support firm. It is also possible to declare the office has no IT support at all.
This data is used by the Organization as a reference whenever the need to contact the IT support arises. Therefore, Decentralized Offices should ensure that the name of the OTC is constantly updated and will be displayed in "IT Information" section of each Decentralized Office.

Add IT Support
To Access this section, select the Office from the drop down menu and click on the "IT Support" tab:

To add a new IT support provider click the "+ Add IT Support" link:
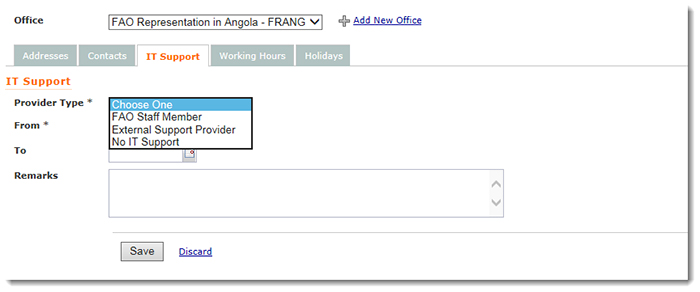
IT Support:
- Provider Type: Select the type from the drop down menu.
Depending on the type of provider selected, there will be a different set of information required:
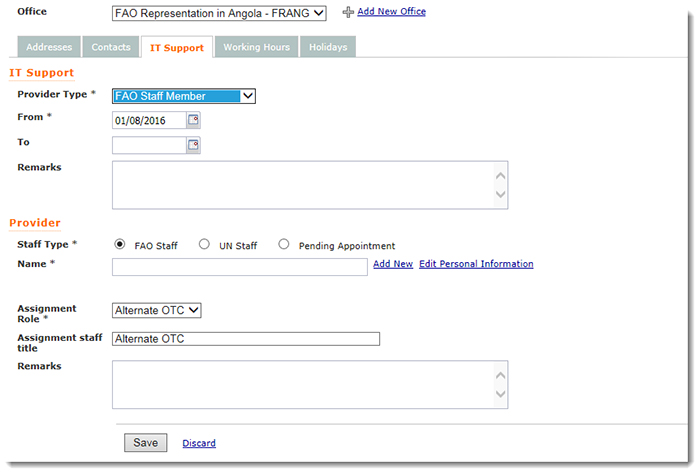
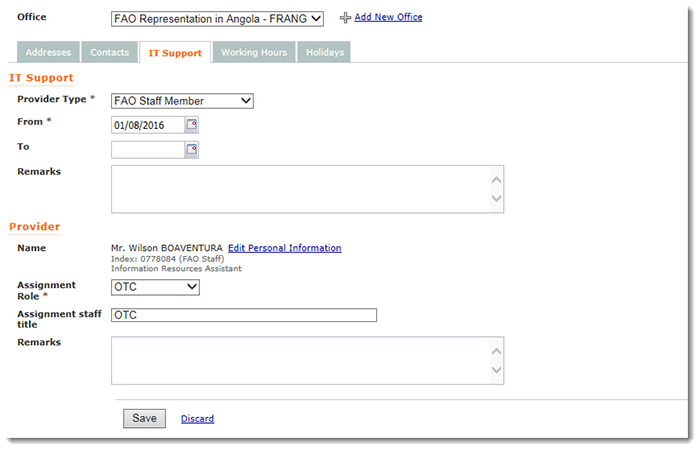
IT Support:
- Provider Type*: FAO Staff Member
- From*: Please select from the calendar the date in which the staff takes on the assignment. Please note that if the previous IT Support provider is still active, its assignment needs to be closed before a new one can be inserted.
- To: To close the assignment, please select from the calendar the date in which the assignment has ended.
- Remarks: Enter any relevant remarks
Provider:
- Staff Type: Select the type of contractual status held by the new ICTO/OTC:
- FAO staff: FAO staff members that hold an index number - This list is extracted from GRMS.
- UN staff: UN staff members working in UN Agencies other than FAO
- Pending appointments: FAO Staff Members under recruitment who have not yet been assigned an index number.
- Name*: Type the surname of the person or part thereof or his/her staff ID (i.e. the index number), the system will display a list of names to select from. Select the person from this list.
- Assignment Role*: Select between Office Technology Coordinator, Information Technology Clerk or Clerk/Administrative IT contact from the drop down menu.
- Assignment staff title: This field is automatic and appears only when the staff has been selected. It is extracted from GRMS for FAO staff, and inserted manually for UN staff and staff Pending Appointments.
- Remarks: Enter any relevant remarks
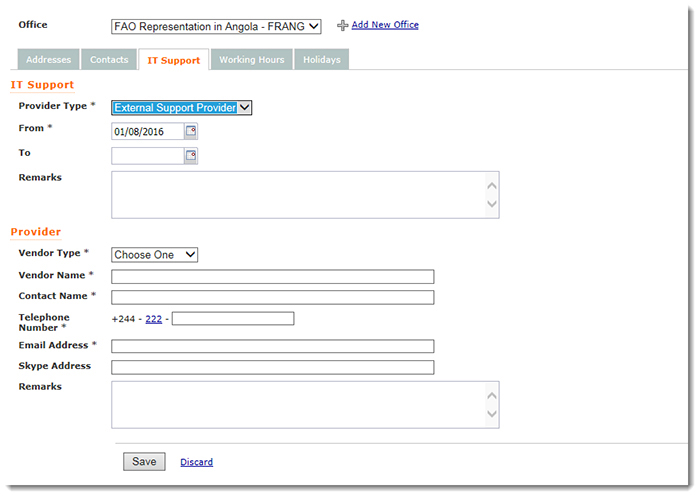
IT Support
- Provider Type*: External Support Provider
- From*: Please select from the calendar the date in which the staff takes on the assignment. Please note that if the previous IT Support provider is still active, his/her assignment needs to be closed before a new one can be inserted.
- To: To close the assignment, please select from the calendar the date in which the assignment has ended.
- Remarks: Enter any relevant remarks
Provider:
- Vendor Type*:
- GRMS Vendor: Vendor already registered in GRMS
- Other: New vendor not previously registered in GRMS
- Vendor Name*: If the "Provider Type" selected is "GRMS Vendor", type the vendor's name or part thereof, the system will display a list of vendors to select from.
If the "Provider Type" selected is "Other", type the full name of the vendor. - Contact name*: Type the name of the firm contact person.
- Telephone number*: Insert the contact's telephone number
- E-mail address:* insert the contact's e-mail address
- Skype address: Insert the contact's Skype address, if any.
- Remarks: Enter any relevant remarks
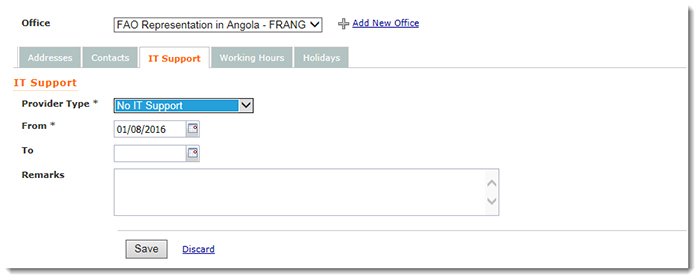
IT Support
- Provider Type*: No IT Support
- From*: Please select from the calendar the date in which the staff takes on the assignment. Please note that if the previous IT Support provider is still active, his/her assignment needs to be closed before dates can be inserted.
- To: To close the assignment, please select from the calendar the date in which the assignment has ended.
- Remarks: Enter any relevant remarks

Please note that all fields marked with an asterisk (*) are mandatory.
Click the "Save" button to save the changes. If you click on the "Discard" link, the window will close without saving.
Edit IT Support
Existing records may be accessed and modified as follows: right click on the IIT Support whose details need to be modified and select the "Edit" option:
Update the record as required and click on the "Save" button or the "Discard" link to close the window without saving:
To Edit Staff Personal Information click the "Edit personal information" link:
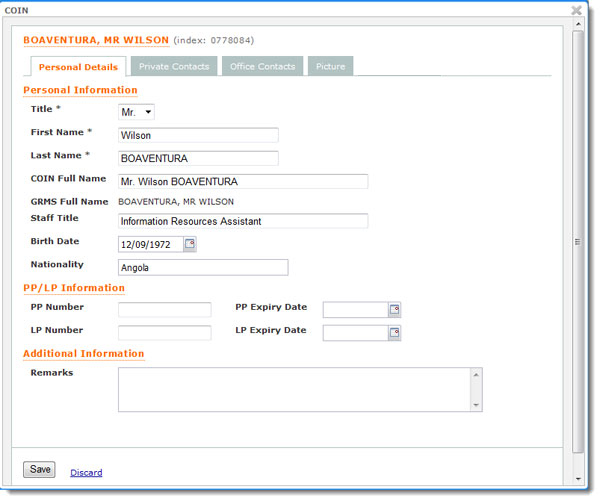
This opens a window with five information tabs: Personal Details, Private Contacts, Office Contacts and Picture.
The Personal Details tab displays the following information and some fields are editable, depending if the Staff has been imported from GRMS or has been Locally inserted in the Staff Presence module:
Personal Information:
- Title*
- First Name*
- Last Name*
- COIN Full Name: Full Name to be displayed in all COIN modules
- GRMS Full Name: This is a read-only field imported from GRMS
- Staff title: Title to be displayed in all COIN modules
- Birth Date: Select from Calendar
- Nationality
PP/LP Information:
- PP Number and Expiry Date: Enter the Passport number and select the Expiry date from the calendar.
- LP Number and Expiry Date: Enter the Laissez passer number and select the Expiry date from the calendar.
Additional Information:
- Remarks: Enter any relevant remarks
Click on the "Save" button to save the changes or the "Discard" link to close the window without saving.
The Private Contacts tab displays the following information:
Address:
- Address Line 1
- Address Line 2
- Address Line 3
- City / State
- Postal Code
- Country
Telephone numbers:
- Residence No.
- Cellular
- Private E-mail
Insert/Update the information and click on the "Save" button to save the changes or the "Discard" link to close the window without saving.
The Office Contact tab displays the following information:
- Dial code & City prefix (automatically generated by the system, but they can be edited by clicking on them)
- Direct Line
- Abbreviated (automatically generated by the system)
- Ext.
- Fax
- Satellite
- Office e-mail
- Cellulars: you can insert up to two numbers
- Skype
Insert/Update the information and click on the "Save" button to save the changes or "Discard" to close the window without saving.
The Picture tab lets you upload or remove/change the photo of the staff member.
To upload a photo click the "click to upload" link.
You can add a new photo or replace/remove an existing one, just click on the relevant link.
Only .jpg and .png format files can be uploaded but they must not exceed 2Mb.

Please note that the fields marked with an asterisk (*) are mandatory.
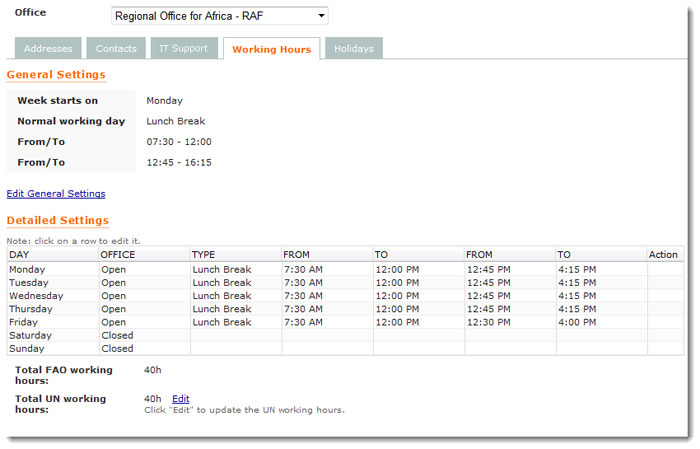
To access the Office Working Hours, select the Office from the drop down menu and click on the "Working Hours" tab:

Please note that Offices in the same country of the FAO Representation will automatically inherit the same working hours.
Create/Update the Working Hours General Settings
Click on the "Edit General Settings" link:
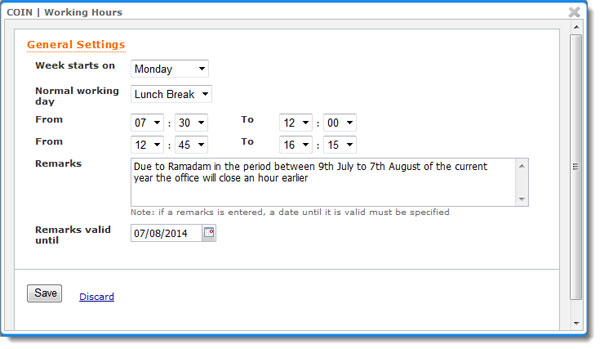
In this section you can insert the general information about your Office Opening hours:
- Week start on: Select the day that represents the first working day of the week from the dropdown menu.
- Normal working day: Specify if the office is always open ("Continuous" option), closed at lunch time ("Lunch break" option) or any other opening hours requiring specific settings("Customized" option) by selecting it from the dropdown menu
- From - To: Select the time from the dropdown menus. (When "Lunch break" or "Customized" is selected two sets of time frames must be selected, before and after the break).
- Remarks: Enter any relevant remarks
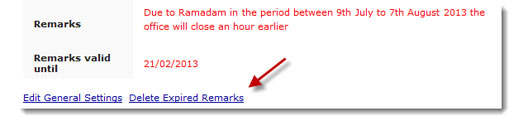
- Remarks valid until: selected the date from the calendar, after this date the remark will be displayed in red and must be removed. To remove the expired remark, click the "Delete Expired Remarks" link:
To validate changes, click on the "Save" button. COIN automatically updates the Detailed settings list below and determines the two closing days of the week. To close the window without saving, click on the 'discard" link.

Please note that there is no distinction between winter and summer. In the case of Ramadan, the opening hours should be updated to adapt to the current period. When Ramadan is over, a new update should be done.
Updating the Working Hours Detailed Settings
To modify the opening hours of a specific day, click on it and all columns in the row will become editable.
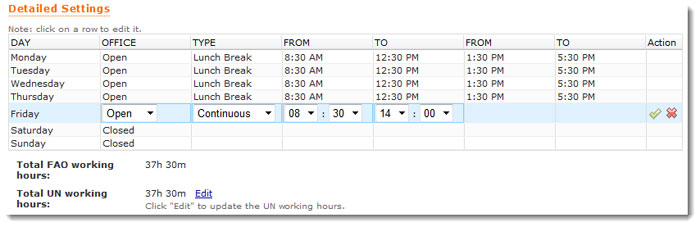
From the "Office" column's drop down menu you can select if the Office is open or Closed on that day.
The "Type" column offers three different possibilities:
- "With Lunch Break" for working days when the office is closed at lunch time;
- "Continuous" for working days when the office does not close at lunch time. In such cases, the system allows to insert only the first set of "FROM - TO" fields.
- "Customized" for working days that have working hours different from the rest of the working week and require specific settings.
The "From" and "To" column allows you to change the actual time for that particular day.
To validate changes, click on the "validation" icon under the "Edit" column, to discard changes, click on the "X" icon. COIN automatically updates the related record accordingly.

To modify the Opening hours of the whole week, use the "Working Hours General Settings".
Total FAO & UN working hours
The system automatically counts the total FAO working hours inserted which should always match the UN working hours, the latter can be modified by clicking the "Edit" link. An office monitoring alert will be automatically activated when the office weekly working hours do not match the UN ones.